sweet progress on your project, projects are fun sometimes


sweet progress on your project, projects are fun sometimes
2002 Lightning - GT headed 5.5Litre w/ Twin 7665s
2002 Silverado - 427Lsx w/ Twin gt4202s
2010 Silverado crewcab Z71 - 5.3litre w/ procharger
2000 Wrangler - 5.3litre with some stance
2014 Xsport- 3.5 Eco boost
412 Motorsports
it ain't that I'm too big to listen to the rumors, It's just that I'm too damn big to pay attention to 'em..That's the difference
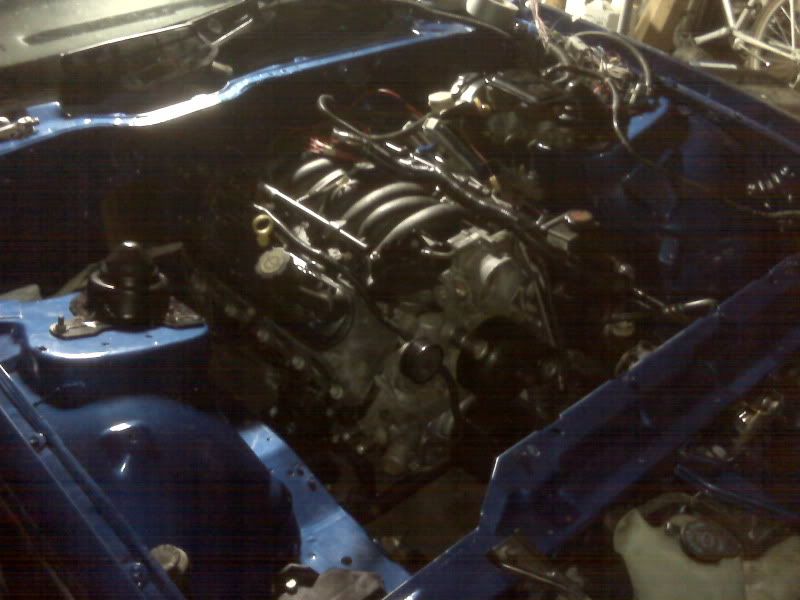
Ok so I got a CRAP ton of stuff done tonight thanks to my bad case of senior-itis ( skipped my last class tonight haha ).
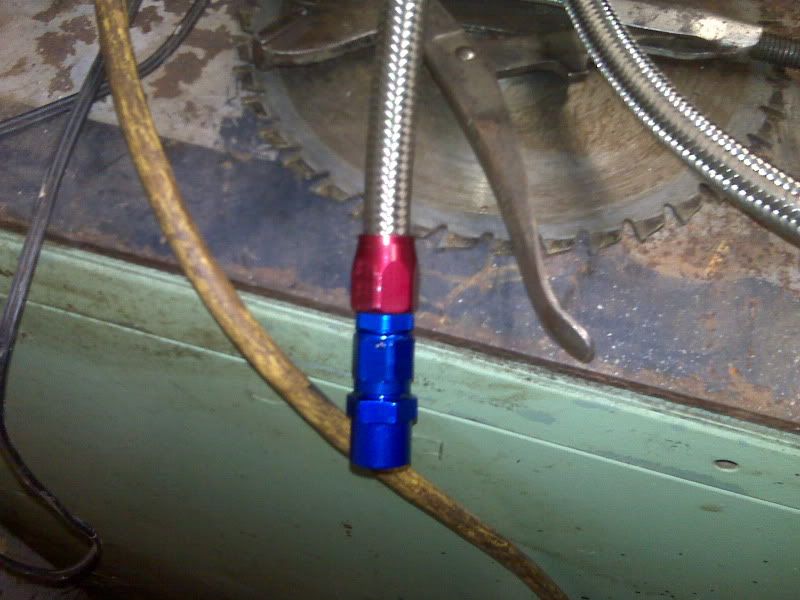
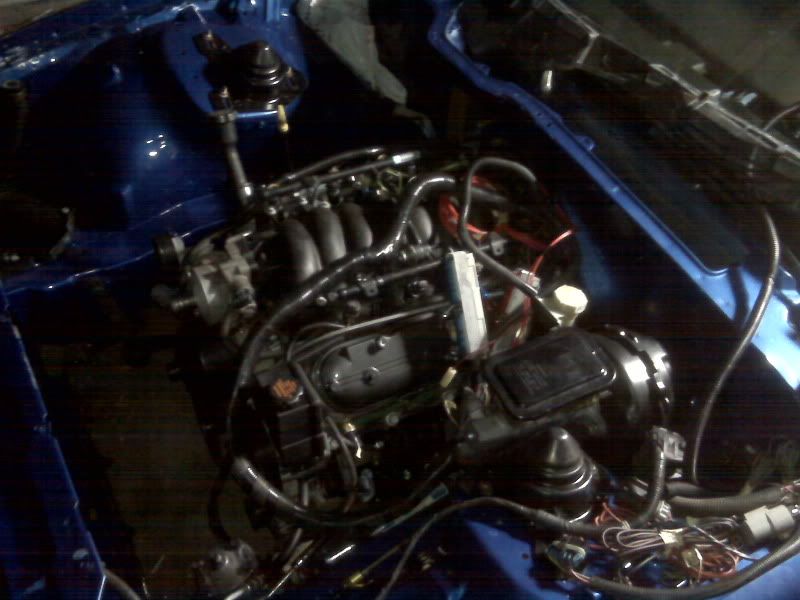
I got to work on the fuel lines tonight since my last fitting came in from Summit the other day. This is the saginaw fitting that goes on the hard feed line coming from the stock sending unit.
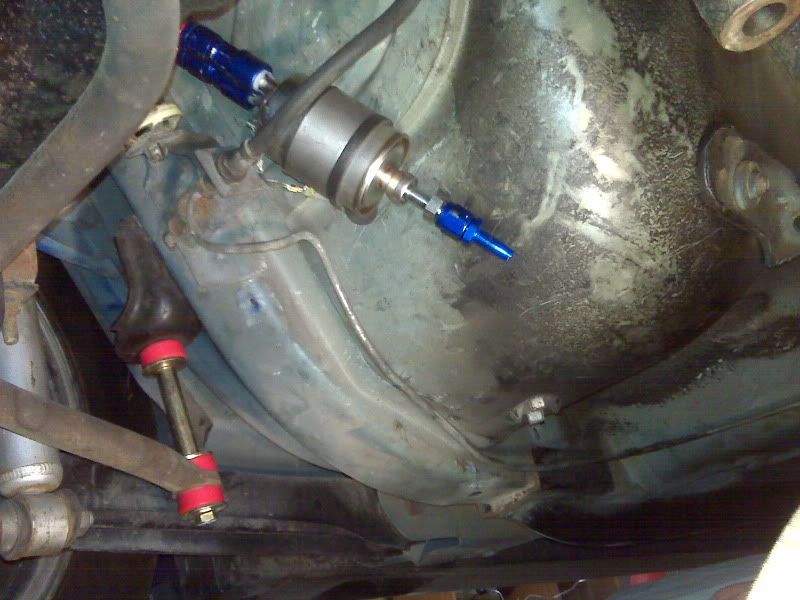
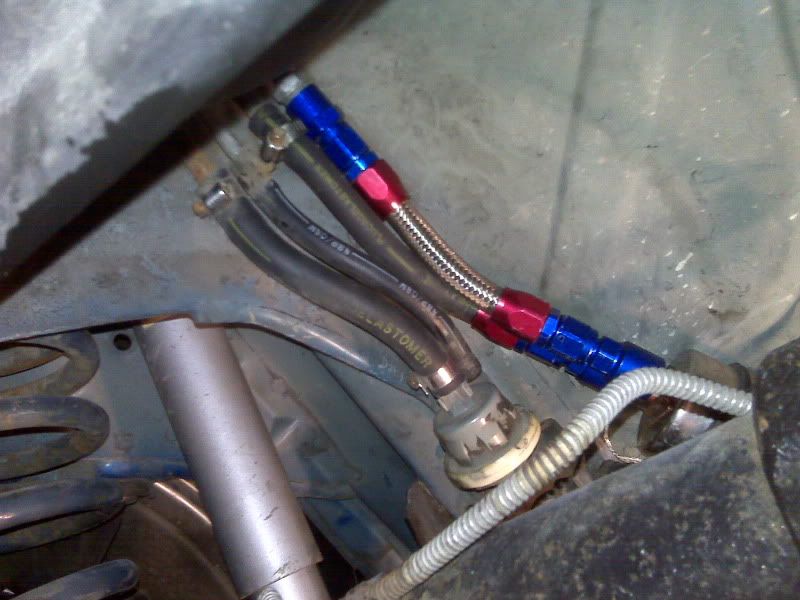
I had to use some imagination to get the fuel filter mounted. With the extra fittings coming off both ends, it made the unit way too long to mount in the stock position (which you can see where the stock one mounted in this picture, in the bottom right corner of the photo). I drilled a hole and put a self-tapping screw in to hold the filter here. I had to mount it vertically instead of horizontally like the stock one. This allowed me to also use the stock rubber line that is used for the return that would have gone into a hard return line. Instead, the rubber line goes into a Russel fitting then straight to the Corvette filter. I'll have more pictures of the fuel lines once I get the motor and transmission in the car this weekend. I didn't want to mess with the feed line coming from the filter because I don't know exactly how long it will be just yet.
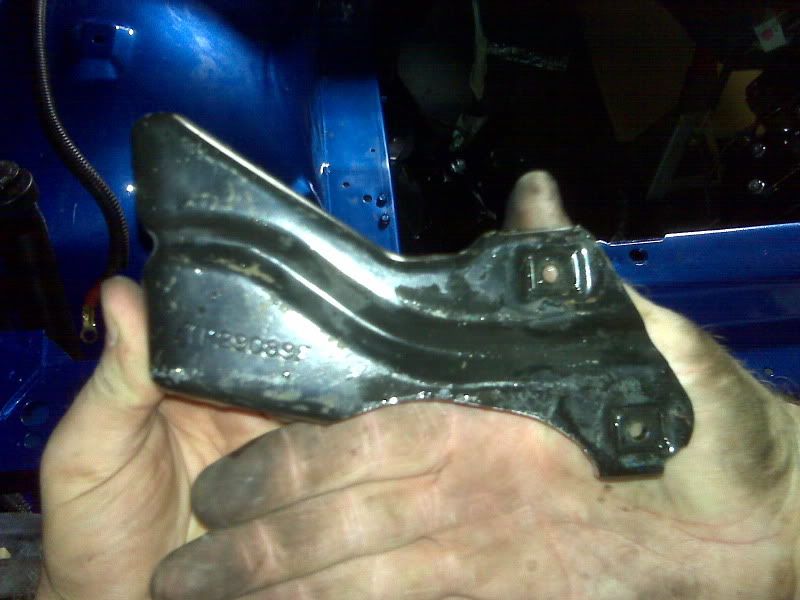
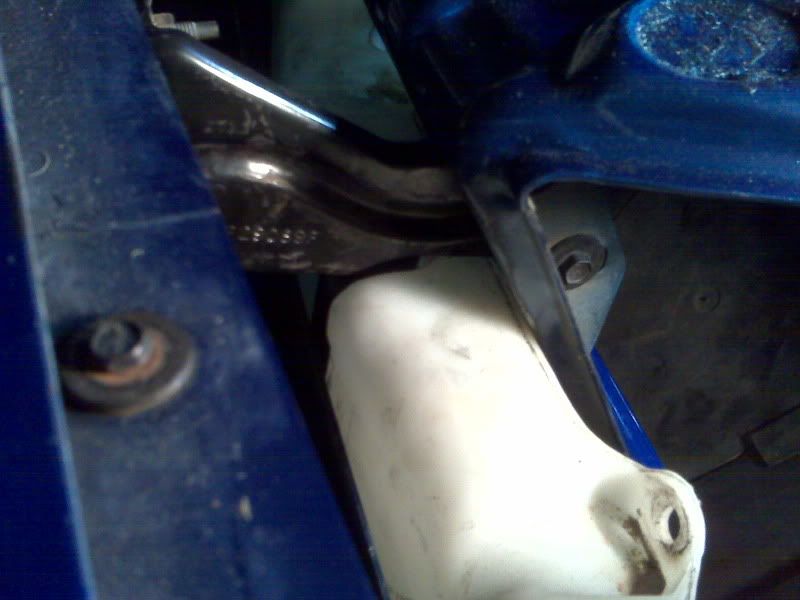
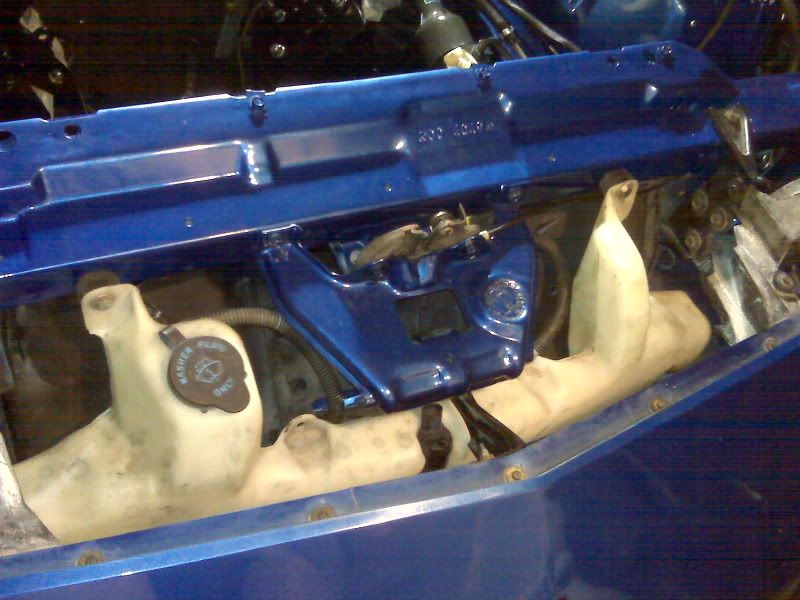
This next piece also took some creativity. As you know from some previous posts, I am using 4th gen coolant and washer tanks, which the washer tank mounts in the front bumper. Well on a 3rd gen there is a black brace that mounts from the front bumper to the brace for the hood latch. I didn't want to toss the piece away because I want to try and use every piece from the stock front end as possible to make it as sturdy as possible. But in order to use this brace it needed to be trimmed down some to clear the top of the washer tank. Here you can see where I made the cut.
And you can see how well it clears the washer tank now.
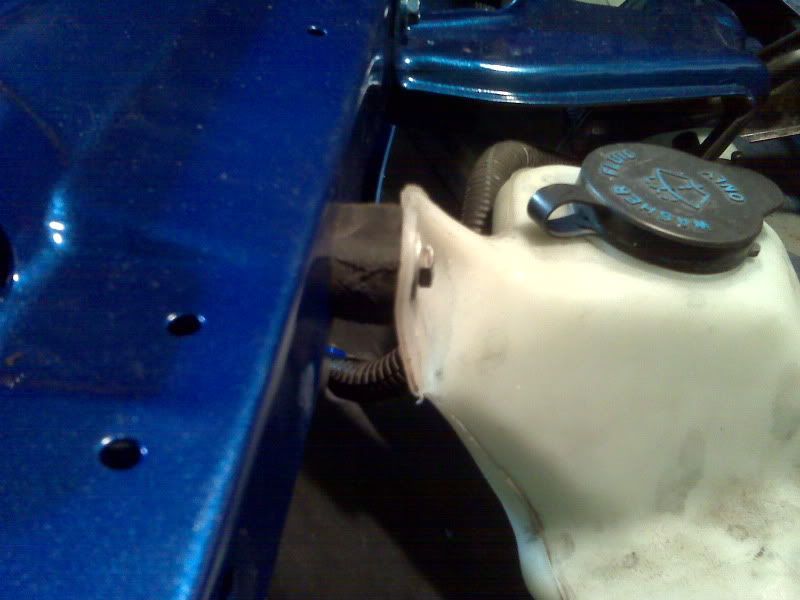
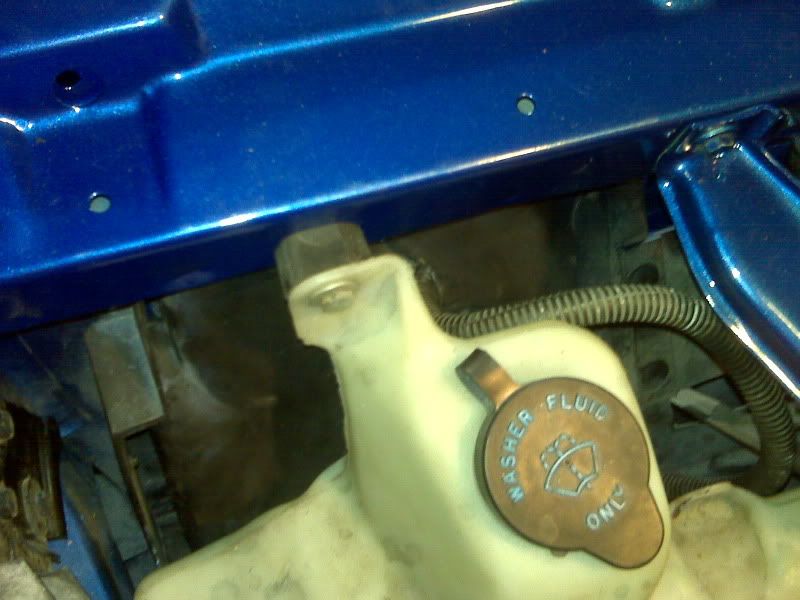
And for mounting the washer tank, yet again, I used my imagination. If you mount it flush against the frame, it hits the hood latch support brace. Ideally, you want to mount an inch or so off the frame so that it's not in a bind, or hitting the brace support. Some people have used a longer bolt and a piece of fuel line as a spacer to keep the tank off the frame a little bit. I took the black plastic trapezoid shaped piece that was used with the stock battery tray to mount the battery in place, and cut it in half, and ground it down smooth into two oval shaped piece. It was just thick enough to meet my satisfaction, so I drilled holes in the two pieces and mounted it just the way it is.
Does this count as a "little" progress?
This is love at first site, if I have never seen it before:
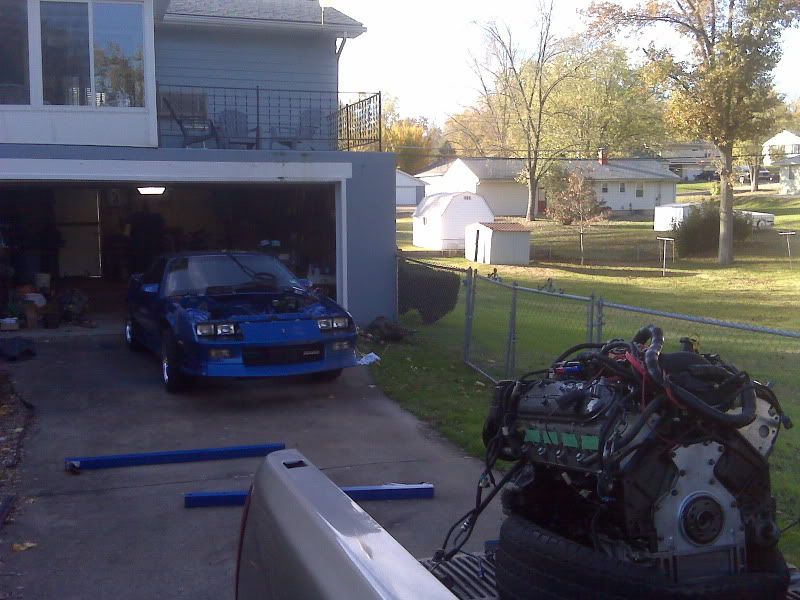
Ok, I think some of you guys are going to be really jealous with this next part. The reason I say that, is because not only did I not have to loosen the motor mount pedestals, or the motor mounts themselves, I also didn't even have to jack the car up off the ground, well partially anyways. All I did was jack the rear axle up off the ground about 8", left the front tires on the ground, and did a lot of lowering and then man-handling the motor and transmission on the hoist and lowered them down together from the top. Both bolts for the motor mounts went in without much problem. In fact, the driver side one went in right away, and I just had to have my friend push down on the block a little while I knocked the passenger side bolt in with a rubber hammer. Easy as pie.
Sorry for the crappy BlackBerry pictures, I am definitely going to clean her up this week and take some really good ones with my Canon DSLR. I've been using my phone to take pictures of most of the progress because it's so handy to use instead of swinging around an actual camera.
Ok, and one more positive note before I begin with the negative that I found tonight.
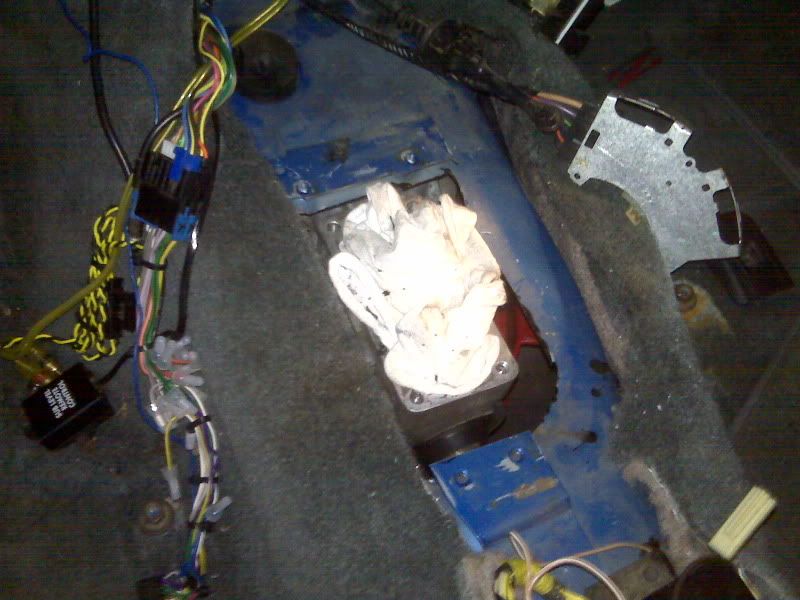
The hole I cut for the shifter seems to be just right. I cut it in the correct spot, it could be a little smaller but I think the lower shift boot will cover most of it.
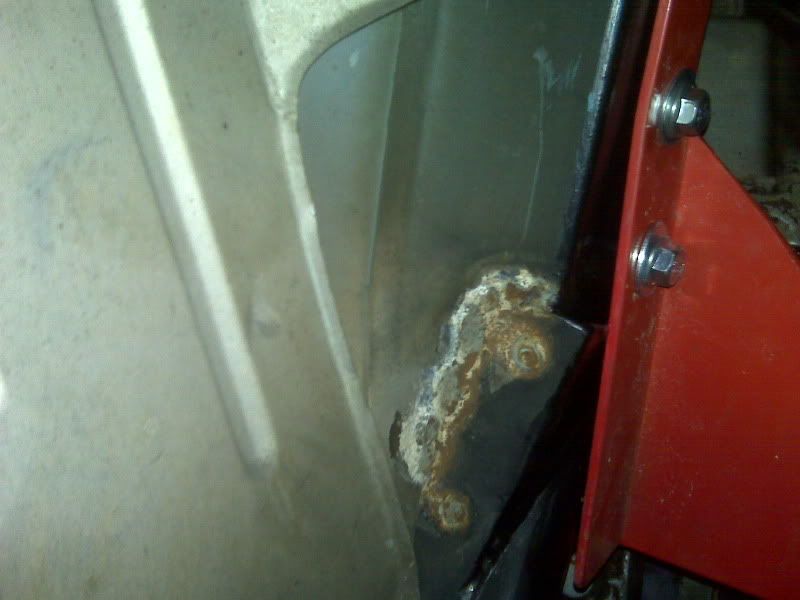
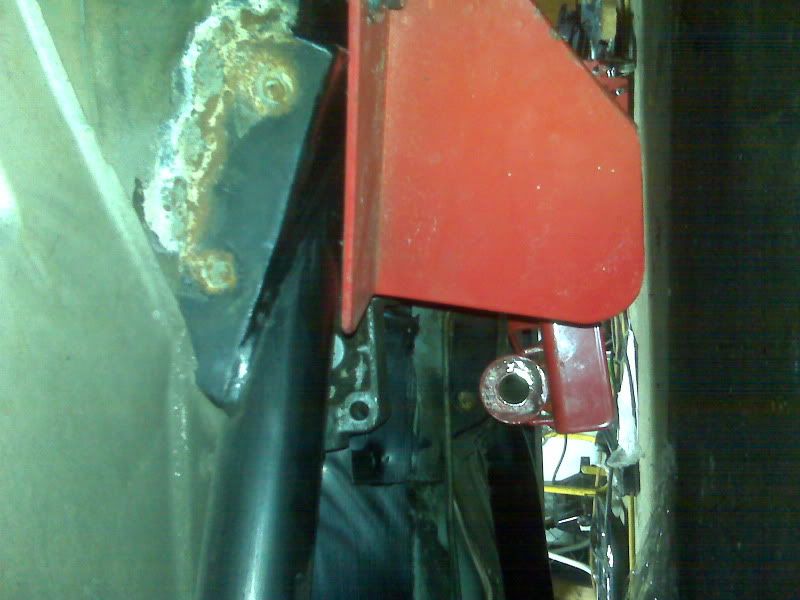
Ok here's the negative. Am I the first person to try using the Alston Racing sfc's and the Spohn T56 crossmember? The reason I ask, is because I haven't come across anyone else with this problem before. I'm thinking I will need to notch out a chunk of the mounting face of the cross member to clear the front of the sfc. You can see how bad it really is, there is like a 1/2" gap between the frame rail and the cross member, creating horrible ground clearance, as well as me not being able to bolt down the cross member all the way without breaking it. I'll wait to get some input from you guys before I start hacking away on it.
This should be sitting flush with the frame rail:
 Posting Permissions

 Reply With Quote